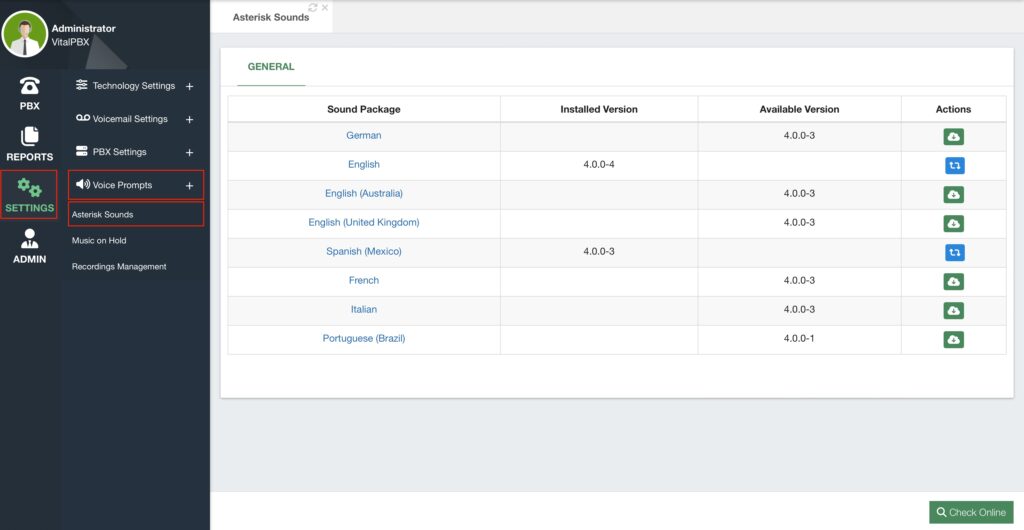
As mentioned in a previous lesson, businesses nowadays may tend to users in multiple languages. This means that you must be able to provide the voice prompts in the caller’s language. With VitalPBX English and Spanish are available by default, but additional languages can be added with the Asterisk Sounds module. This can be found under Settings > Voice Prompts > Asterisk Sounds.

The list of available voice prompt languages will appear blank in the beginning. To see the list of the latest languages, click on the green Check Online button. Next to the available language, you will find the Actions column. Here you can click the green Install button. This will install the voice prompts for that language. Once installed, you will see a blue Reinstall button, and a red Trash button to delete the voice prompt.

Once the language is installed, you can select more language options for voice prompts.
If you see that the voice prompts for a specific language are not available, we have created the following article so you can translate the prompts directly, https://vitalpbx.com/blog/how-to-translate-for-free-your-pbx-voice/.
In this article, we show you a small application we have created that uses Google© Translate™
to translate the voice prompts. You can then verify the translation and record the prompts, or use the following article to use Microsoft© Azure’s™ Text-to-Speech to record these prompts,
https://vitalpbx.com/blog/free-voice-guide-with-azure-free/. In this other article, we use another small application we have created to connect with Microsoft© Azure’s™ TTS capabilities to record the prompts for us.
Afterward, you can send the translated recordings to us at [email protected], and we will be able to add them to a future version of VitalPBX.


