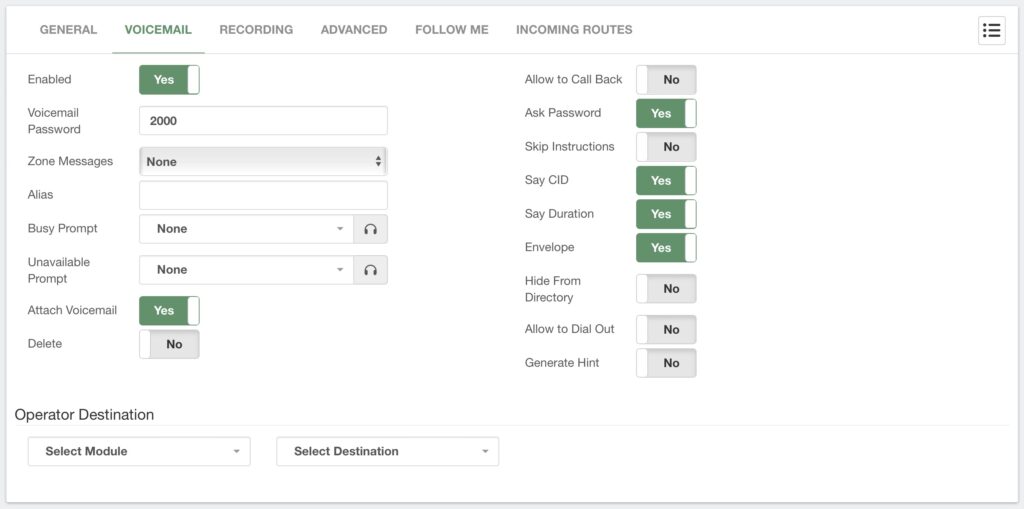
Voicemail is a neat feature that comes with VitalPBX out of the box. Let’s configure it for our extensions so we can receive a message whenever we are unavailable.
To do so, let’s return to our extensions under PBX > Extensions > Extensions. Select an extension we have already created or create a new one.
Go to the Voicemail tab next to General.

The first option is to Enable or Disable voicemail for this extension. By default, this comes on for all extensions. Later on, we will see how we can turn this off by default.
Next, there’s the voicemail password. If this is set to the same number as the extension number, the user must follow the initial setup process when entering their voicemail box. This is useful if you wish to reset the voicemail box for a user.
It is possible to choose a Zone Message; this will dictate how the voicemail envelope is read with the time format. Later on, we will see how you can create a zone message.
You can change the alias for the Dial by Name feature and have custom Busy and Unavailable voicemail prompts.
You can then Enable or Disable the Attach Voicemail and Delete options, which are part of the Voicemail to Email feature. So you can attach a .wav file to the email and delete it from the system once it is sent.
Then, you have multiple permissions to
- Allow to Call Back the voicemail sender.
- Ask for the Password when entering this extension’s voicemail box.
- Skip Instructions, so the caller won’t hear the instructions for leaving a message.
- Say CID before the voicemail message.
- Say the Duration of the voicemail message.
- Enable or disable the Envelope playback before a message.
- Hide from the Directory so the extension cannot be found with the Dial by Name
feature. - Allow to Dial Out from the voicemail box.
- Generate Hint so other users can monitor this extension’s voicemail box.
Ultimately, you have the Operator Destination, the destination when the caller dials “0” after leaving a message.
Remember to Save/Update and then Apply Changes.


