To register a VitXi WebRTC user with VitalPBX, you first need to create an extension configured specifically for WebRTC communication.
This ensures proper signaling, secure media transport, and compatibility with browser-based SIP clients.
Access the Extensions Module #
- Log in to your VitalPBX Administration Panel.
- Navigate to: PBX/Extensions/Extensions
Configure the Extension #
When creating the new extension, set the following required parameters:
| Field | Recommended Value | Description |
|---|---|---|
| Technology | PJSIP | Required for WebRTC operation. |
| Profile | Default WebRTC Profile | Uses the WebRTC configuration you set earlier. |
| WebRTC Client | Yes | Enables WebRTC-specific settings such as WSS transport and DTLS-SRTP. |
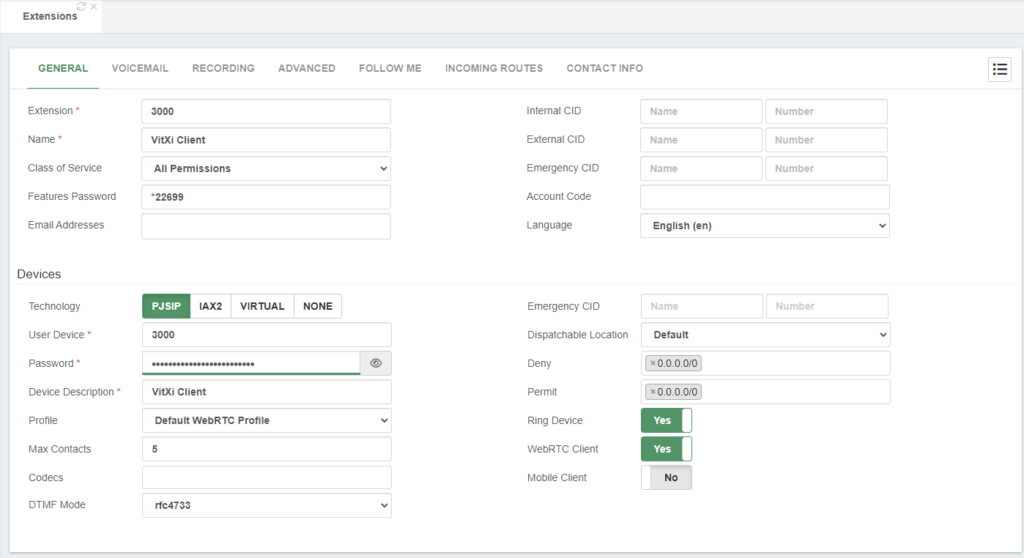
You may also configure additional settings like voicemail, features password, and display name according to your organizational needs.
Save and Apply Changes #
Once all parameters are configured:
- Click Save to store the new extension.
- Then click Apply Changes to activate it.
If you don’t apply the changes, the new WebRTC extension will not be registered in Asterisk.
Next Steps #
Your new WebRTC-enabled extension is now ready to be used by a VitXi user.
In the next section, you’ll learn how to create a VitXi user and assign this extension/device within VitalPBX for browser-based communication.


