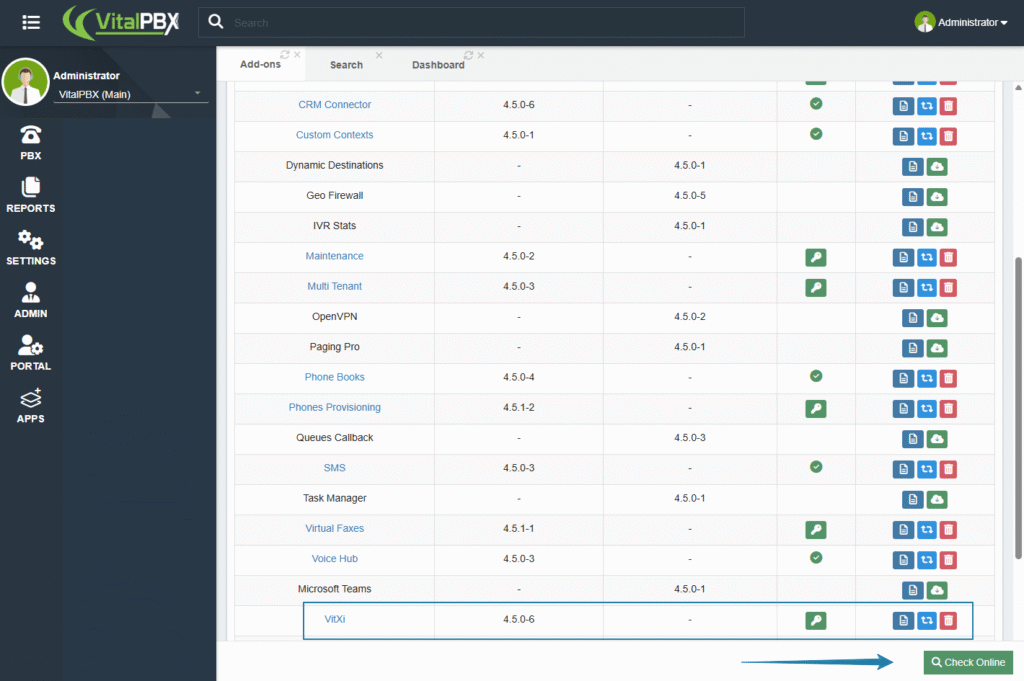
There are two ways to install VitXi on your VitalPBX server — either through the VitalPBX GUI or via the server terminal.
Install from the VitalPBX GUI #
- Log in to the VitalPBX Administration Panel.
- Navigate to Admin → Add-Ons → Add-Ons.
- Click the Check Online button to refresh the list of available add-ons and ensure that you install the latest version of VitXi.
- Locate VitXi in the list and click Install.

By installing through the GUI, you automatically receive two free VitXi WebRTC licenses included with the Community Edition of VitalPBX. This allows you to explore and test VitXi’s features immediately.
Install from the Server Terminal #
If you prefer installing directly from the command line, connect to your VitalPBX server via SSH and run the following commands:
Copy to clipboard
sudo apt update
sudo apt install vitxi -y
This will download and install the latest version of VitXi WebRTC from the official VitalPBX repositories.


